Your First Status Set
This walks through setting up a classic Red / Amber / Green status set and turning it on for a folder, start to finish.
1. Create a status set
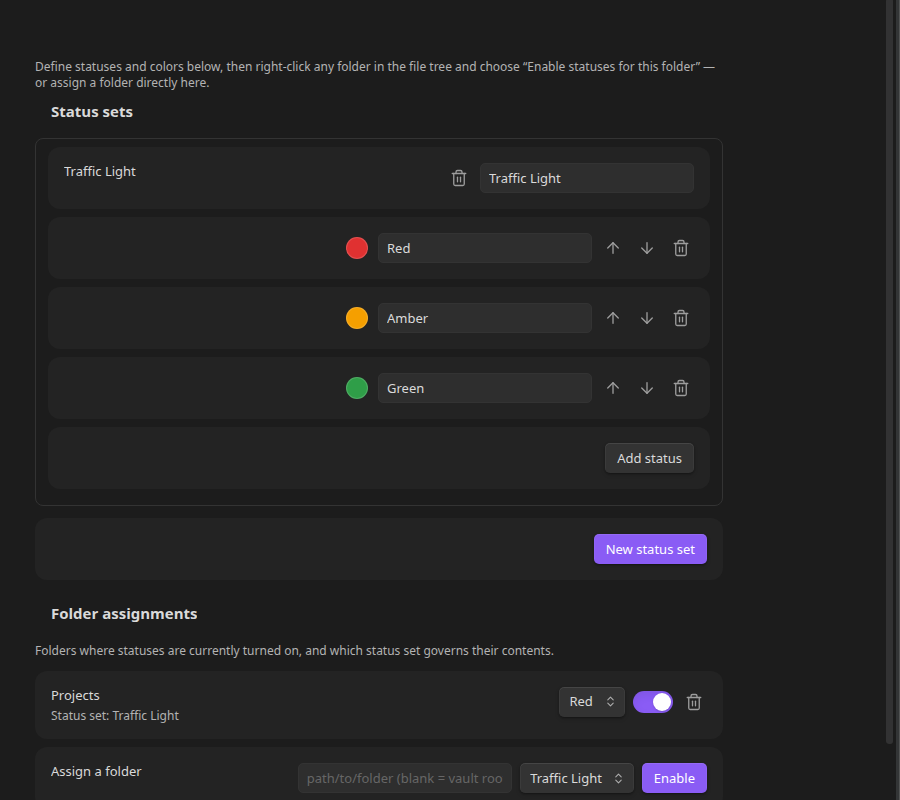
Open Settings → Status Sets and click New status set. Give it a name — "Traffic Light" works well for a general-purpose set.
Click Add status three times and set each one up:
| Label | Color |
|---|---|
| Red | a red |
| Amber | an amber/orange |
| Green | a green |
The order you put them in matters — it's also the sort order used when a folder groups its contents by status, so put your "not started" state first and your "done" state last.
2. Turn it on for a folder
Right-click any folder in the file tree — say, a Projects folder — open File and Folder Status Options, and choose Enable statuses for this folder.
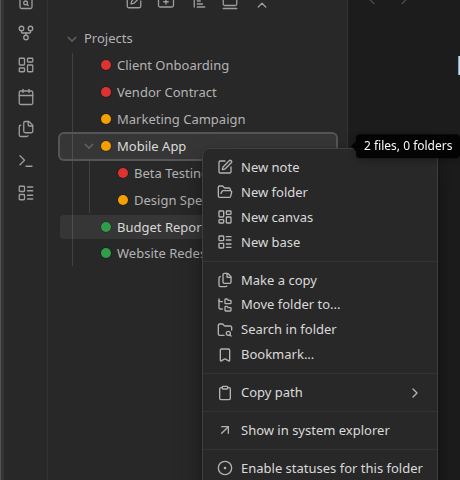
Pick the status set you just created, then pick a default status — the one every item in the folder starts out with. Every file and subfolder directly inside Projects now shows a colored dot.
3. Change a status
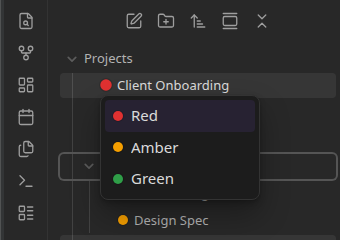
Click any dot to open a small popup listing every status in that folder's status set. Pick one, and the dot updates immediately — the item also moves to sit alongside everything else with the same status, since the folder groups by status automatically.
4. Turning it off (and back on)
Right-click the folder again and choose File and Folder Status Options → Disable statuses for this folder to turn the dots off. Your assignments aren't lost — re-enable it later and everything comes back exactly as you left it.
Next
- Want more than one status set, or statuses scoped to specific folders? See Status Sets and Colors.
- Curious what happens with nested folders? See Assigning Folders and Defaults.